
A softener, a face wash, a cotton pad and a cleansing tool can sit next to each other on a bathroom shelf, but they do different jobs. Choosing becomes easier when you start with the step you want to improve. This guide explains the formats in our pore-care collection, the practical differences between them and how to read a routine without turning it into a long shopping list.
You do not need every item shown here. A pad is useful only when you have a liquid product to put on it. A tool adds a particular way to apply, cleanse or massage. A spot patch covers an individual area rather than serving as an all-over cleansing step. Keep the purpose of each item clear, and let its own packaging guide the way you use it.
Start with the job, then choose the product
Before comparing bottles, describe what you want to do in one sentence. You might want a rinse-off cleanser, a targeted softening step around the nose, a pad that fits that area or a convenient way to apply a wash-off mask. Those are different tasks. Buying several products that share the word “pore” does not automatically create a useful sequence.
If your main question is how to use a product you already own, start with its label. Check the exact name, size and edition. Similar-looking packaging can belong to a liquid softener, a cleanser or a separate pad pack. Keep the carton until you have read the directions and understood which items are included. A photograph showing two products together may be illustrating a pairing rather than a complete set.
Then look at your existing routine. A new tool does not necessarily require a new cleanser. Dry pads may work with a liquid product you already use, provided its directions allow that application. A cooling massager is a separate choice about the feel of a finishing step. Thinking this way helps you choose a specific addition instead of rebuilding everything at once.
| Your task | Format to consider | Detail to check |
|---|---|---|
| Wash and rinse | Cleansing foam | Application and rinsing directions |
| Target surface buildup | Sebum softener | Pad application and contact time |
| Apply liquid skincare | Dry cotton pads | Shape, dimensions and sheet count |
| Add a manual cleansing step | Brush or care tool | Working surface and intended use |
| Cover an individual spot | Hydrocolloid patch | Patch size and replacement directions |
Understand the softening step
Our Super Melting Sebum Softener is a light liquid applied with a soaked pad. Its role is to soften surface buildup in a chosen area before gentle removal. That makes the application different from quickly spreading a foaming cleanser over your face. The pad holds the liquid in place while you give it the contact time described in the directions.
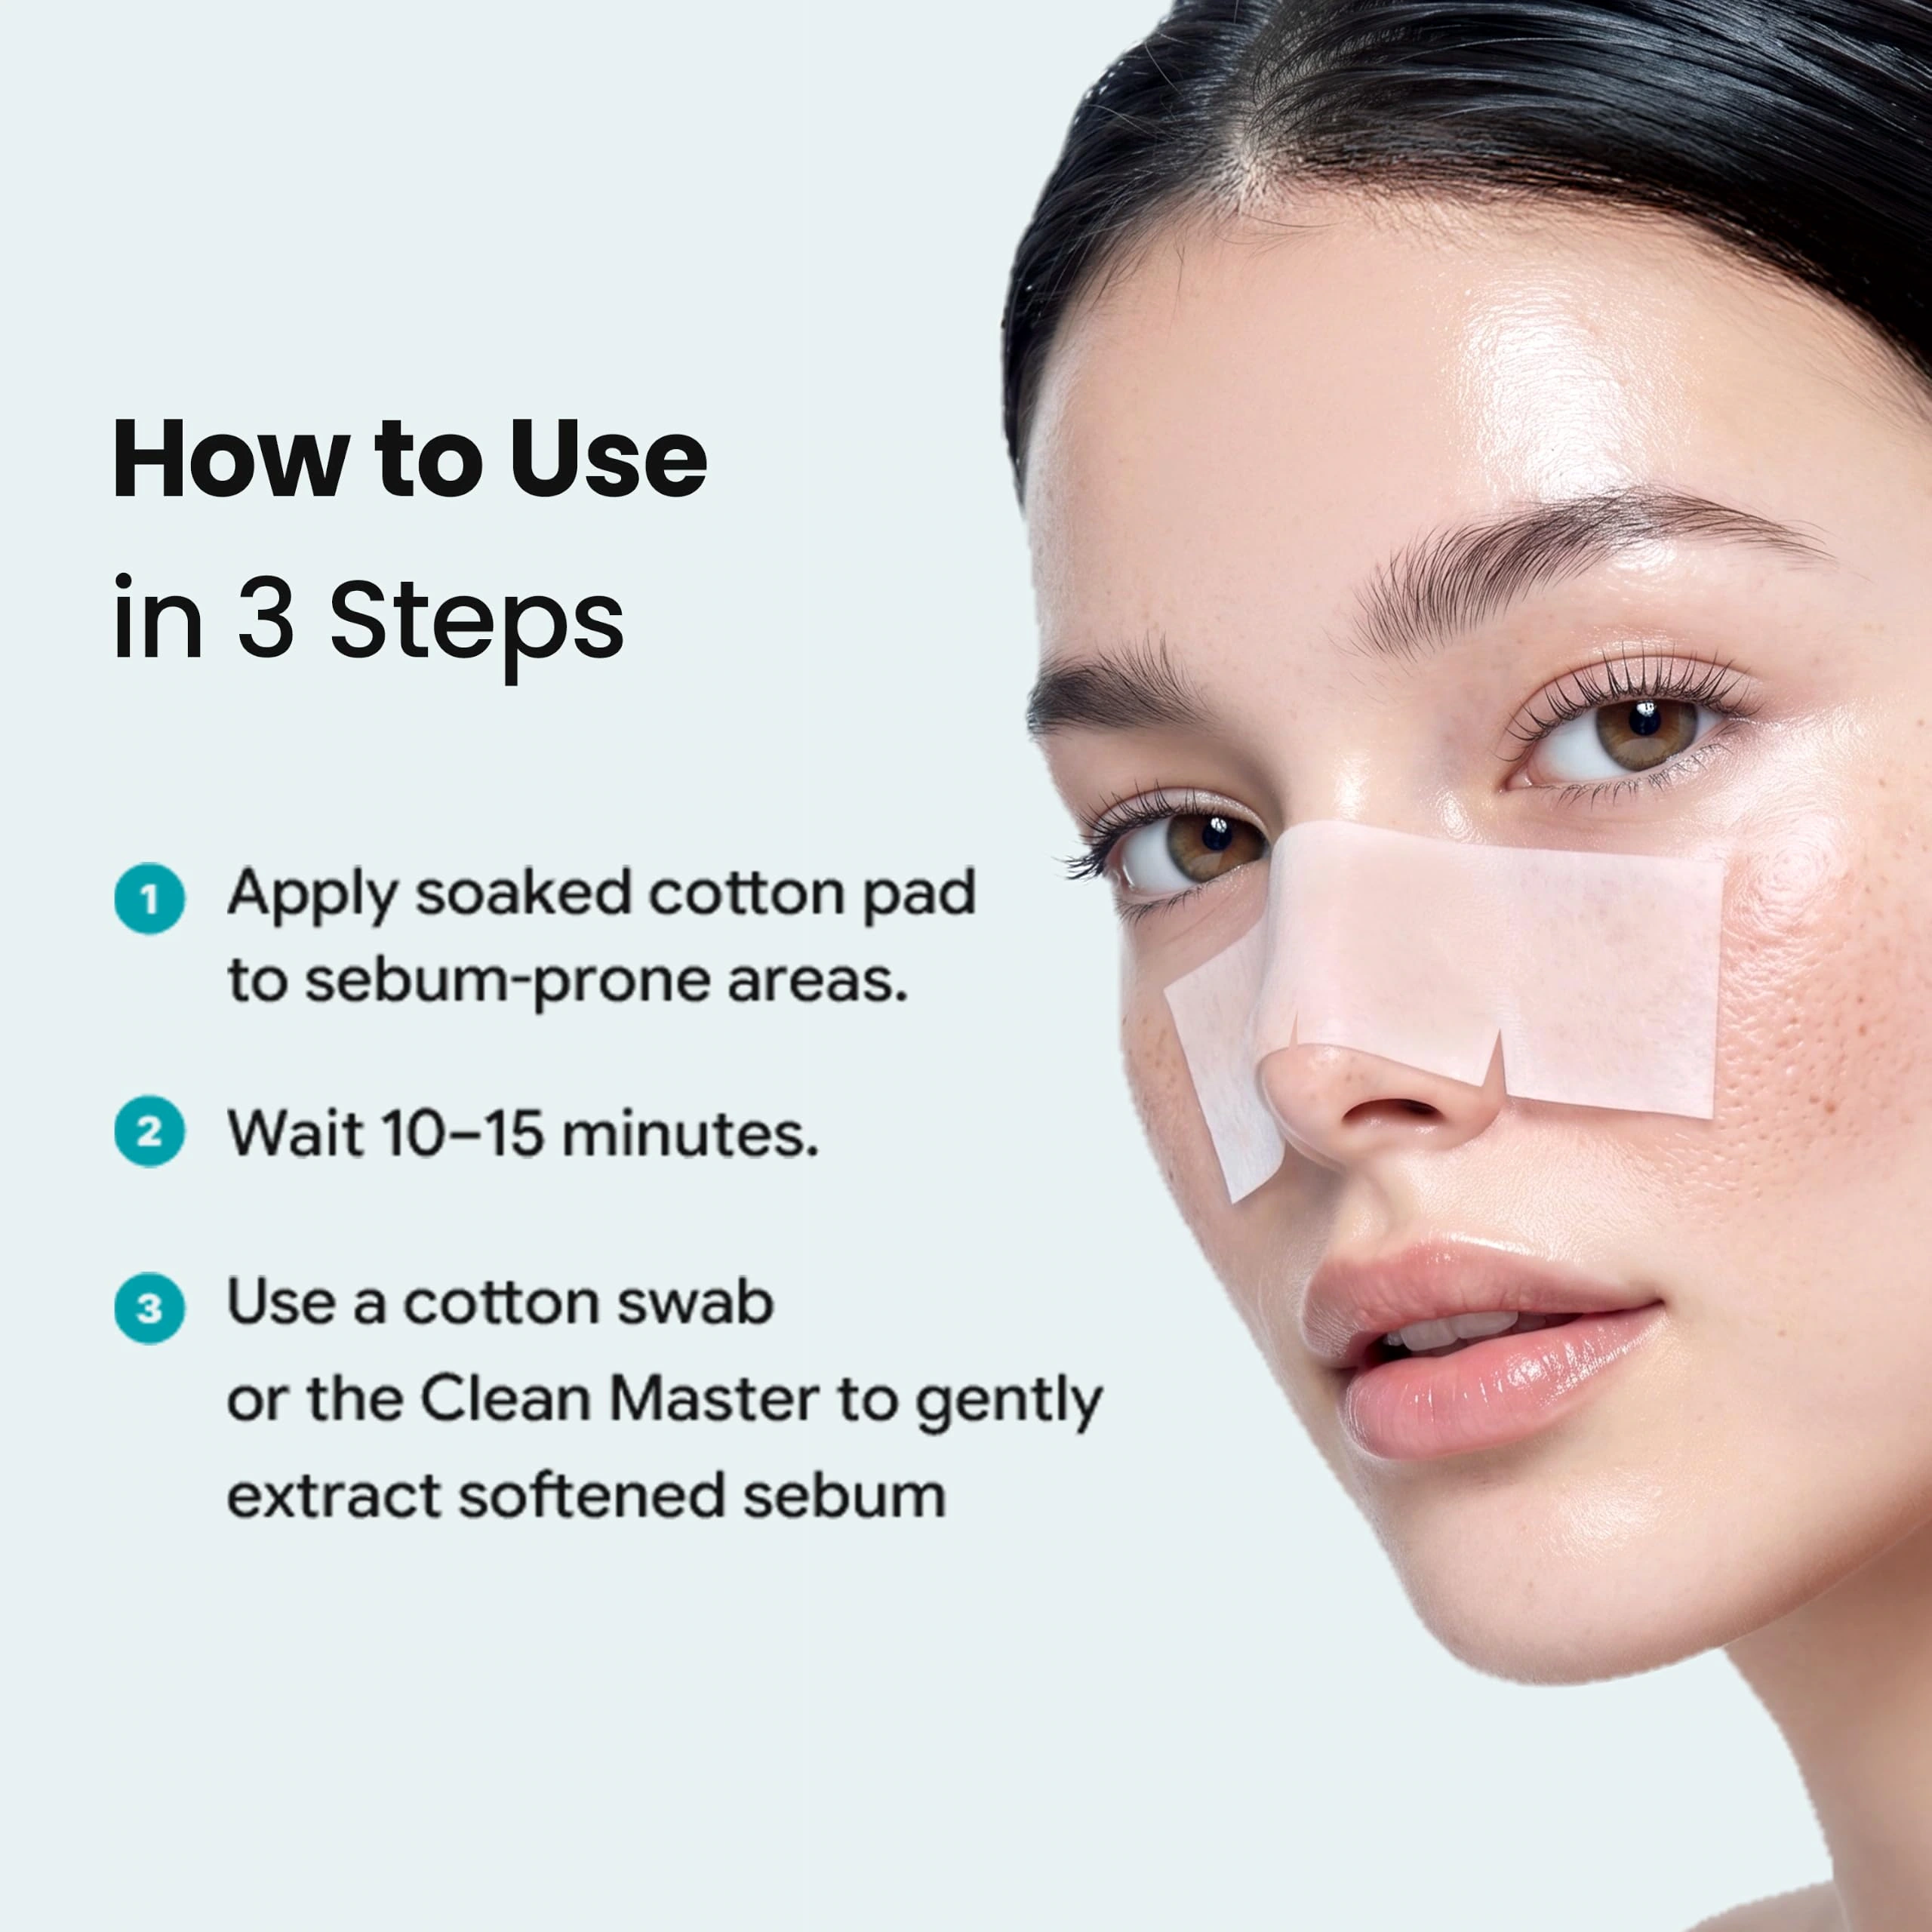
The illustrated softener directions show a soaked pad placed over an area such as the nose, followed by a wait of 10 to 15 minutes. They then show gentle removal with a cotton swab or the Deep Clean Master. Follow the directions on your own packaging, including any updated instructions. If the product feels uncomfortable, remove it rather than waiting for the timer to finish.
Prepare the things you need before starting: the product, a fresh pad, a clean place to set the bottle and whatever your directions specify for the next step. This avoids handling drawers or reaching for a tool while the pad is already in place. Put the cap back on the bottle after dispensing. Keep the tip clear of used pads and other surfaces.
The pad should be comfortably saturated when you place it. A nearly dry sheet is not the same application as a soaked one. Smooth it into contact gently and keep it away from the eyes, lips and broken or irritated skin. Do not increase the amount, extend the time or repeat the step simply because you expect a stronger visible result.
When the application is finished, keep the removal step gentle. The American Academy of Dermatology advises against picking, squeezing or digging into pores because irritation can make them look more noticeable. That guidance is a useful boundary for any routine: a product or tool should not become a reason to force something out. Read the AAD guidance on visible pores.
Choose a pad by shape and placement
The two dry pad formats in this collection have a simple, visible difference. The 1/3 Saving Cotton Pad is a compact rectangle measuring 50 by 70 mm. The Skin Wrap Cotton Pad is longer, measuring 40 by 108 mm, with cut lines designed to help it follow a contour. Both come in packs of 40 sheets. Neither is a pre-soaked treatment.
A small rectangle gives you flexibility when you want to place liquid skincare on one part of the cheek, chin or T-zone. Its straight edges make the area of coverage easy to see. A long shaped pad may be more convenient around the nose and neighboring contours. The choice is about where you want the liquid to sit, rather than one shape being necessary for everyone.
It helps to picture the dimensions in your hand. The longer pad has more width to wrap around a curve, while the rectangle is easier to position on a smaller flat area. If you already have one format, try its intended placement before assuming you need the other. Avoid stretching a saturated sheet tightly across the skin just to make it cover more space.
For either format, take a clean sheet from dry packaging, add the compatible liquid and follow that product’s instructions. The pad itself does not set the contact time. A toner application and a softener application may have different directions, even when they use the same sheet. Once a pad has been used, discard it; do not return it to the box.
When comparing pad packs, check sheet count as well as shape. A large photograph of a stack can make packs look similar even when the quantities differ. Our product pages show the count and dimensions beside the description so you can compare the actual formats. Keep the remaining sheets away from splashes and close the packaging after taking one out.
Match the tool to its working surface
The Deep Clean Master and the Pore Cleansing Master have similar names but different working surfaces. The Deep Clean Master has a shaped stainless steel edge and a short handle. It is shown after the softener step, gently sweeping away softened surface buildup. The Pore Cleansing Master is a silicone brush with a cushioned bristled head, used with cleanser and water.
That distinction matters more than the color of the handle. A steel-edged tool should not be treated like an everyday scrubbing brush. Use it only as directed, with a clean working edge and light pressure on prepared skin. It is not intended to pierce a blemish. If something does not lift easily, repeated pressure is not the next step.
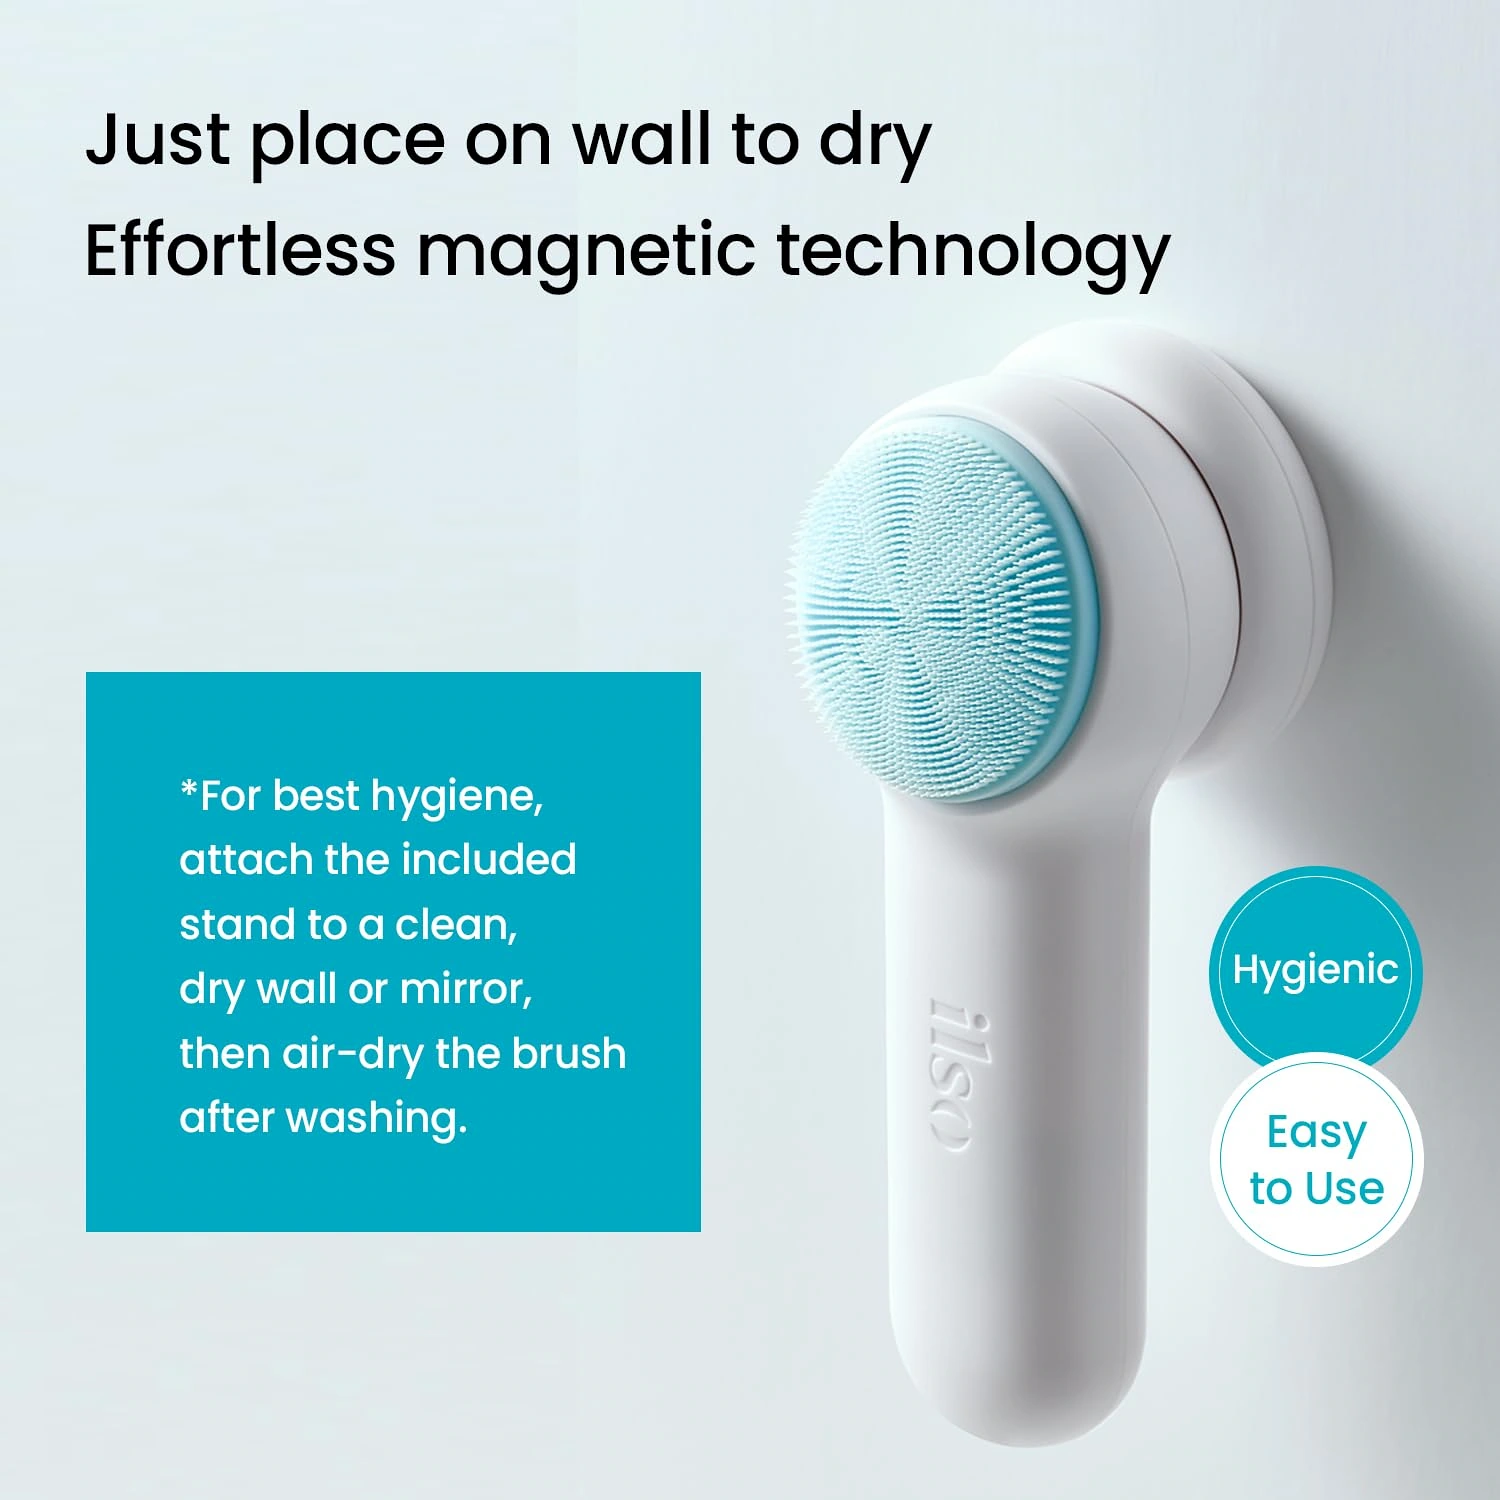
The Pore Cleansing Master works differently. Its illustrated instructions show applying cleanser, wetting the brush and moving it gently in small circular motions. Afterward, both the face and the brush are rinsed. Its magnetic mount provides a place to air-dry the brush off the countertop. Position the mount on a suitable clean, dry surface according to the supplied directions.
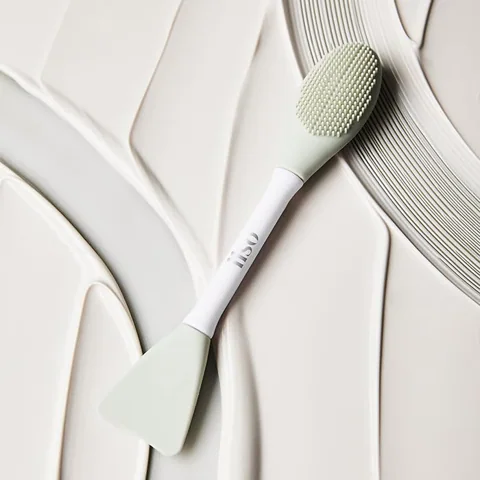
The Dual Clean Brush offers another arrangement: one end is a flat silicone mask applicator and the other is a textured cleansing brush. If applying a wash-off mask neatly is your main task, the flat end may be the useful feature. When using the textured side, follow the cleanser’s directions and rinse product from between the bumps after use.
A manual tool is optional. The AAD’s face-washing advice favors a gentle cleanser, lukewarm water and fingertips, and notes that other washing implements can irritate skin. If a brush does not feel comfortable for you, leave it out. Adding a tool is not a requirement for washing your face well. See Face washing 101.
Before buying, compare the action you want to perform with the tool’s actual shape. A photo of the working edge or bristles is more useful than a broad promise about “deep cleaning.” Our detail galleries let you enlarge those views. Look at the head, grip, size and storage arrangement, then choose the one whose intended job matches yours.
Keep cleanser and mask directions separate
Grain Potato Pore Cleansing Pack Foam has a creamy texture that lathers with water. Its illustrated directions show two application approaches. One begins by spreading the product on dry skin and then adding water with wet hands. The other begins by adding water in the hand to make a lather before applying it. Both finish with a thorough rinse.
The product’s name includes “pack” and “foam,” so it is especially useful to read the instructions rather than decide from the name alone. Do not turn a rinse-off product into a leave-on cream. If your edition includes a different application time or method, follow the packaging in your hand. Keep the eye area clear unless the label expressly says otherwise.
Special editions can also change what the box looks like or what accessories are pictured. The selected product here is the Boosil Gamja edition. Before ordering, check the selected option and the included contents in the purchase tab. A character illustration, brush or accessory in a gallery can be part of an edition presentation; confirm the actual offer you choose.
If you are using a separate wash-off mask, its directions remain the guide for amount, contact time and removal. A spreading tool can make application tidier, but it does not change the mask’s formula or instructions. Keep the tool clean, avoid dipping a used edge back into a container and rinse any mask residue from the tool before storage.
Know what a finishing tool can offer
The Dual Cooling Master is a manual facial massager with two stainless steel contact surfaces. The smaller plate is designed for narrow areas; the larger plate covers a broader area such as the cheek or forehead. Its main practical distinction is that you can choose the contact surface without switching to a second tool.
Choose it for a cool-feeling massage and convenient handling. A cooling sensation should not be confused with permanently changing pore size. Follow the preparation instructions supplied with the tool, keep the pressure light and move it gently. If either the temperature or the contact feels uncomfortable, stop. There is no benefit in trying to tolerate an unpleasant sensation.
Storage matters here too. A massager placed on a wet shelf may pick up residue between uses. Give it a clean place to dry, and check the contact surface before putting it against your face. If you carry it in a travel bag, keep it separate from loose toiletries and clean it according to the instructions before using it again.
Treat spot patches as their own format
No Problem Spot Patch contains 72 hydrocolloid patches in three sizes. The two smaller round options measure 10 and 12 mm, and the pack also includes a larger shaped option. This variety lets you choose a patch that covers the area without using several smaller patches next to each other. It is a different format from a shaped nose-care sheet.
Apply a patch to clean, dry skin. Choose a size whose edges can sit beyond the area you want to cover, lift it from the sheet carefully and avoid touching the center. Smooth the edges into contact without repeatedly lifting and replacing the same patch. Cream or oil at the edge may interfere with the way it stays in place.
The product directions describe white dots as an indicator for replacement. Follow those directions and discard the patch after removing it. Do not use the patch as a reason to squeeze or pick at the area underneath. If a spot is painful, repeatedly troublesome or leaves you unsure what you are treating, a dermatologist can give advice suited to your skin.
Make room for one new step at a time
When several new products arrive together, it is tempting to use the whole collection that evening. A more manageable approach is to understand and introduce one addition before considering the next. That makes it easier to tell whether the format is convenient, whether you like the texture and whether the directions fit the time you actually have.
The AAD recommends testing new skincare on a small area before using it more broadly. Its home-testing guidance describes using the normal amount, keeping to the product’s usual contact time and watching for a reaction over seven to ten days. A rinse-off product should still be rinsed according to its instructions. Read the complete testing guidance.
Home testing is not a guarantee that a product will suit every part of your face, and it is not the same as diagnostic patch testing carried out by a clinician. If a product causes a reaction, wash it off and stop using it. Seek professional advice when symptoms are severe, persist or leave you unsure what to do next.
Keep your plan realistic. If a targeted application takes a little longer, choose a time when you can follow the directions without rushing. There is no need to build every optional step into every wash. Your existing moisturizer and daytime sun protection have their own place; a pore-care purchase does not make the rest of your routine irrelevant.
Read the last screen before placing an order
Use the purchase tab as a final comparison point. Match the product name and edition to the item you intended to buy, then check the quantity. A single pack of pads, a multi-item bundle and a bottle with an accessory can have similar photographs. Look at the written contents as well as the main image, especially when choosing a special edition.
Review delivery and return information for that exact option. A familiar product name does not mean every seller or package has the same terms. Keep the order confirmation so you can find the selected item later. If you need help after purchase, open that order in the account used at checkout rather than sending a general message without its details.
When the package arrives, compare its label and contents with your order before discarding the outer packaging. Read the enclosed instructions even if you have used a similar product before. Store the remaining carton or a clear record of the directions somewhere you can find it. This is particularly useful when a tool has a protective cap, a storage mount or preparation instructions that are easy to overlook on a first use.
Set up a clean, practical space
A small amount of preparation can make the routine easier to repeat. Keep dry pads away from the sink’s splash area. Store the softener upright with its cap closed. Give reusable tools somewhere to dry after rinsing. If the bathroom shelf stays damp, choose a different clean storage spot rather than putting a wet tool straight into a closed container.
For the Deep Clean Master, the illustrated care instructions are straightforward: rinse thoroughly, dry completely and replace the protective cap. For a brush, pay attention to the spaces around the bristles as you rinse. A product film left in those spaces can be easy to miss when you only look at the handle. Check both ends of a dual-ended tool.
Pack only what you need for travel. A sealed pad pack and a capped bottle are easier to keep organized than loose sheets beside a damp wash bag. Let a tool dry before packing it whenever possible. If you move products into travel containers, retain their names and directions so you do not confuse a softener with a cleanser later.
When shopping for replacements, return to the practical details that made the original choice work: pad dimensions, sheet count, working surface, bottle size and edition. You can compare our cotton pads, browse cleansing and massage tools or go directly to the Super Melting Sebum Softener. Choose the next item for the job you need it to do.